Having suffered with night vision problems for along time, I have found one herb that has a reputation for improving this dilemma. Bilberry....
Bilberry was given to the fighter pilots during the World War to help improve night vision - for some background info.
If you can't find bilberry in capsules, make your own. Here's how:
* Find a health food store that sells bilberry in bulk.
* Buy as large a portion as you feel comfortable with. For about 20 capsules, I find it takes about
1/4 cup ground bilberry.
* Buy some empty capsules. These are sold in health food stores, also. Or, find them in the natural foods aisle of your grocery store. The capsules can be purchased either vegetarian or nonvegetarian. Your choice.
Store the bilberry capsules in an airtight container on your kitchen shelf away from heat.
Tuesday, January 29, 2008


Monday, January 21, 2008
Why Organic Food?
If one is not familiar with all the benefits of organic food, they are missing out. It is not just a fad or trend. Choosing organic food over non-organic food has many advantages, including:
* Taste. This is the deciding factor for choosing organic food. Once you taste unadultered food, you won't want to go back.
* No pesticides. Many times, a non-organically grown food will have a very strong aftertaste of chemicals. It is just repulsive.
* Environmentally friendly. By not using chemically-produced pesticides, the soil is healthier for all involved.
* Less food allergies. The pesticides used on traditional agriculture crops is known to cause food allergies in a variety of people.
These are but a few of the reasons to eat organic. Yes, the products will cost more than the traditionally grown, but the alternative is well worth it.
* Taste. This is the deciding factor for choosing organic food. Once you taste unadultered food, you won't want to go back.
* No pesticides. Many times, a non-organically grown food will have a very strong aftertaste of chemicals. It is just repulsive.
* Environmentally friendly. By not using chemically-produced pesticides, the soil is healthier for all involved.
* Less food allergies. The pesticides used on traditional agriculture crops is known to cause food allergies in a variety of people.
These are but a few of the reasons to eat organic. Yes, the products will cost more than the traditionally grown, but the alternative is well worth it.
Monday, January 14, 2008
Another Way to use Peppermint
Peppermint provides us with a variety of ways to enjoy it. It is soothing, tasty, and versatile. One way to enjoy it is as a coffee flavoring.
Go to your local grocery and buy bulk peppermint leaves. Not only does it smell delicious, but it tastes just as good. Store the leaves in a glass jar, away from heat.
Peppermint is traditionally known to help with digestion. Using it as a coffee flavoring helps decrease the coffee's acidic effect upon the stomach - it works wonders in my case.
Peppermint Coffee
(makes 24 ounces, 4 servings)
4 heaping tablespoons ground coffee
1 teaspoon peppermint leaves
24 ounces of cold water
Place into coffeemaker and brew until done. Serve with milk, if desired.
Go to your local grocery and buy bulk peppermint leaves. Not only does it smell delicious, but it tastes just as good. Store the leaves in a glass jar, away from heat.
Peppermint is traditionally known to help with digestion. Using it as a coffee flavoring helps decrease the coffee's acidic effect upon the stomach - it works wonders in my case.
Peppermint Coffee
(makes 24 ounces, 4 servings)
4 heaping tablespoons ground coffee
1 teaspoon peppermint leaves
24 ounces of cold water
Place into coffeemaker and brew until done. Serve with milk, if desired.
Saturday, January 12, 2008
Soothing Porridge
With colder weather upon us, a very simple way to start your day with a wealth of nutrients is found in what I like to call...Soothing Porridge. It's very easy to make...
1 1/4 cup water
1/2 cup oats (no quick cooking, thank you)
2 T raisins
1/2 medium apple, peeled and diced
1 T dried cranberries or other dried fruit
cinnamon
Place all ingredients into small saucepan. Bring to boil, reduce heat and cook until oats are soft.
Pour into bowl and sprinkle with cinnamon. Add milk, if desired. Or, I enjoy it without milk. The sweetness from the fruits doesn't require any additional sugar.
Enjoy!
1 1/4 cup water
1/2 cup oats (no quick cooking, thank you)
2 T raisins
1/2 medium apple, peeled and diced
1 T dried cranberries or other dried fruit
cinnamon
Place all ingredients into small saucepan. Bring to boil, reduce heat and cook until oats are soft.
Pour into bowl and sprinkle with cinnamon. Add milk, if desired. Or, I enjoy it without milk. The sweetness from the fruits doesn't require any additional sugar.
Enjoy!
Wednesday, January 09, 2008
New Food Producer
When I recently went to the grocery store, I was surprised to see a new line of food items on the shelves. Disney has a line of food items. That's right...Disney. It's not bad enough that every time we turn around, Disney is flooding our airways, movies, and store shelves with their new toys and characters. No, that is not enough....
Disney has entered the food industry. I saw colorful packages of sugary cereal just the other day. Beware......
Disney has entered the food industry. I saw colorful packages of sugary cereal just the other day. Beware......
Sunday, January 06, 2008
Easy Citrus Squeeze
This is so easy, it's almost embarrassing. A very easy and tasty way to add some extra pizzazz to some steamed (or baked) seafood is to simply squeeze a fresh orange over it.
As soon as you remove the seafood (salmon is especially scrumptious) from cooking, place it on your serving plate. Cut an orange in half and just squeeze the juice over your piece of seafood.
Besides adding some extra sweetness to your seafood, the citric acid from the orange will aid your digestion.
This works equally well with tangerine, lemon, or lime. I, personally, prefer a nice, sweet orange. Actually, whatever your favorite citrus fruit is, will do.
Now, isn't that easy? Enjoy!!
As soon as you remove the seafood (salmon is especially scrumptious) from cooking, place it on your serving plate. Cut an orange in half and just squeeze the juice over your piece of seafood.
Besides adding some extra sweetness to your seafood, the citric acid from the orange will aid your digestion.
This works equally well with tangerine, lemon, or lime. I, personally, prefer a nice, sweet orange. Actually, whatever your favorite citrus fruit is, will do.
Now, isn't that easy? Enjoy!!
Thursday, January 03, 2008
Natural Healing Remedy
While recently in a pharmacy, someone was asking what to take for motion sickness. He was searching for an over-the-counter product. What's a natural alternative that works just as well, if not better?
Ginger. I've tried this and swear by it. Simply put some ground ginger into a coffee mug. Add hot water and steep. Viola - ginger tea. I steep it for about 2 minutes, and the taste is good. Add sugar, if desired.
If you don't like ginger tea, put the ginger into capsules (which you can buy at any health food store). Simply take a capsule with some water. No big deal.
Ginger has been known to have anti-nausea properties for centuries. It helps with troubled digestion, upset stomachs, and - as mentioned- motion sickness.
This is just one natural healing alternative to the pharmacy-profession produced products.
Disclaimer: This advice works for me, it may not work for you. I am not responsible for any negative consequences from you taking action on my advice.
Ginger. I've tried this and swear by it. Simply put some ground ginger into a coffee mug. Add hot water and steep. Viola - ginger tea. I steep it for about 2 minutes, and the taste is good. Add sugar, if desired.
If you don't like ginger tea, put the ginger into capsules (which you can buy at any health food store). Simply take a capsule with some water. No big deal.
Ginger has been known to have anti-nausea properties for centuries. It helps with troubled digestion, upset stomachs, and - as mentioned- motion sickness.
This is just one natural healing alternative to the pharmacy-profession produced products.
Disclaimer: This advice works for me, it may not work for you. I am not responsible for any negative consequences from you taking action on my advice.
Monday, December 31, 2007
Scottish Shortbread
Shortbread are popular cookies for everyone. They can be made into rolled, shaped cookies. Or, they can be made into pan cookies. The batter can be pressed into a baking pan and cut into squares or finger-shapes.
Shortbread are recommended for those who have to watch their sugar intake, and they are tasty for those just wanting a wonderful taste treat.
Here's a very simple and quick recipe for all to enjoy! Even though you can save calories and fat by using margaine, I wouldn't touch margarine with a ten-foot pole. The butter is just TOO delish!
Scottish Shortbread
wet ingredients:
1-1/4 cup butter
1 cup brown sugar
Mix these two ingredients together until creamy.
dry ingredients:
2-1/2 cups unbleached flour
dash of salt
Stir these ingredients into the creamed mixture. Mix thoroughly.
Preheat oven to 350.
Lightly grease a 9"x13" baking pan.
Press mixture into pan and even it out. It'll be about 1/4" thick.
Bake for about 15-20 minutes, until edges are brown.
Remove from oven when done and cool prior to cutting.
Makes about 25 bars.
Shortbread are recommended for those who have to watch their sugar intake, and they are tasty for those just wanting a wonderful taste treat.
Here's a very simple and quick recipe for all to enjoy! Even though you can save calories and fat by using margaine, I wouldn't touch margarine with a ten-foot pole. The butter is just TOO delish!
Scottish Shortbread
wet ingredients:
1-1/4 cup butter
1 cup brown sugar
Mix these two ingredients together until creamy.
dry ingredients:
2-1/2 cups unbleached flour
dash of salt
Stir these ingredients into the creamed mixture. Mix thoroughly.
Preheat oven to 350.
Lightly grease a 9"x13" baking pan.
Press mixture into pan and even it out. It'll be about 1/4" thick.
Bake for about 15-20 minutes, until edges are brown.
Remove from oven when done and cool prior to cutting.
Makes about 25 bars.
Thursday, December 27, 2007
Back At It
This blog has been on hiatus due to personal obligations. It is starting back up now with the intent of helping others learn about the ease of healthy eating.
Enjoy! MarieB
Enjoy! MarieB
Thursday, March 01, 2007
Need help with financial reporting?
Financial reporting can be a cumbersome task. Many software packages fail to provide the needed information in order to make informed decisions. That is not the case with Prophix. This financial reporting software applies to both financial and non-financial reporting. It provides unified reporting, easily distributable reports, supporting of industry standards, and analytical capabilities. Forecasting, budgeting, and reporting can all be accomplished with this software package.
Tuesday, November 21, 2006
Guide to Kids' Holiday Craft Projects
With the holiday season upon us, have the little ones pitch in and make some decorations and/or holiday fare for others to enjoy. Here are some suggestions and how tos for kids’ craft projects: These craft projects are geared toward the 4-7 year old.
Personalized ornaments
Items needed:
Toxic-free glue pencils/sticks
Plain, shiny gold or silver ornaments. The larger ones are preferred since they give a larger working area.
Glitter: different colors; red, gold, silver, green are best
(Put each glitter into its own small bowl)
Papers to cover the table
Pictures of trees and stars
How To Make Ornaments:
Place the papers onto the working area (table). Cover thoroughly.
Have the kids sit around the table.
Give each kid an ornament.
Tell them to be very careful since the ornaments break easy.
Give them each a glue pencil/stick
Tell them to put their favorite person’s name onto the ornament with glue
(Show them by example)
Or...they can draw a Christmas tree, a star, or an angel on the ornament
Once they have completed putting the glue onto the ornament,
Have them sprinkle the glitter over the glue.
They can use a variety of colors, if desired.
Let their imagination go wild!
Personalized Snowflakes
Another great craft project for kids is to make their own snowflakes of different sizes and colors.
Items Needed:
White copy paper
Different colored construction paper
Different sized construction paper (you may have to cut the 8-1/2 x 11” size in half.)
Blunt edged scissors
Crayons or colored pencils
How To Make Snowflakes:
Demonstrate the following before having them start:
Fold the paper in half.
Fold the paper in half again.
Cut triangles along all sides.
Cut triangles of different sizes
For white paper, kids can color as desired.
After done cutting:
kids can write their names on the snowflakes with crayons.
Personalized & Decorated aprons:
For the small cook, nothing would be enjoyed more than to have his or her own personalized apron. Buy a plain apron and let them decorate as their imagination tells them!
Items Needed:
Cotton apron, lighter colors preferred
Permanent magic markers – have red, black, and green available
A large working area such as a table
How to Make a Personalized & Decorated Apron:
Give each kid an apron
Place the magic markers in the center of the table.
Have the kids sit around the table
Explain to them what they are to do
Tell them that they can put their name on the apron. (For instance, show them how they can write “Marie’s (their name) Apron” on their very own apron.
Tell them that they can draw pictures of Christmas trees, stars, angels, etc. on their apron.
Let them know that the apron is a gift that will be used for years to come.
Enjoy!
Personalized ornaments
Items needed:
Toxic-free glue pencils/sticks
Plain, shiny gold or silver ornaments. The larger ones are preferred since they give a larger working area.
Glitter: different colors; red, gold, silver, green are best
(Put each glitter into its own small bowl)
Papers to cover the table
Pictures of trees and stars
How To Make Ornaments:
Place the papers onto the working area (table). Cover thoroughly.
Have the kids sit around the table.
Give each kid an ornament.
Tell them to be very careful since the ornaments break easy.
Give them each a glue pencil/stick
Tell them to put their favorite person’s name onto the ornament with glue
(Show them by example)
Or...they can draw a Christmas tree, a star, or an angel on the ornament
Once they have completed putting the glue onto the ornament,
Have them sprinkle the glitter over the glue.
They can use a variety of colors, if desired.
Let their imagination go wild!
Personalized Snowflakes
Another great craft project for kids is to make their own snowflakes of different sizes and colors.
Items Needed:
White copy paper
Different colored construction paper
Different sized construction paper (you may have to cut the 8-1/2 x 11” size in half.)
Blunt edged scissors
Crayons or colored pencils
How To Make Snowflakes:
Demonstrate the following before having them start:
Fold the paper in half.
Fold the paper in half again.
Cut triangles along all sides.
Cut triangles of different sizes
For white paper, kids can color as desired.
After done cutting:
kids can write their names on the snowflakes with crayons.
Personalized & Decorated aprons:
For the small cook, nothing would be enjoyed more than to have his or her own personalized apron. Buy a plain apron and let them decorate as their imagination tells them!
Items Needed:
Cotton apron, lighter colors preferred
Permanent magic markers – have red, black, and green available
A large working area such as a table
How to Make a Personalized & Decorated Apron:
Give each kid an apron
Place the magic markers in the center of the table.
Have the kids sit around the table
Explain to them what they are to do
Tell them that they can put their name on the apron. (For instance, show them how they can write “Marie’s (their name) Apron” on their very own apron.
Tell them that they can draw pictures of Christmas trees, stars, angels, etc. on their apron.
Let them know that the apron is a gift that will be used for years to come.
Enjoy!
Easy Wholefoods Cooking

In today’s hurried society, many things we once took for granted are now becoming obsolete. A hand written letter, a hand ironed wardrobe (can’t say I miss this one!), and even a hand prepared meal at home. Yes, cooking is becoming a lost art. The fast food society has fit in perfectly with our fast paced lifestyle. The deli sections in grocery stores are more popular than ever. Some very tasty and quickly prepared foods can be picked up here. The same goes for the frozen food section. There is a wide variety to suit any discriminating palate found here. And, it is all so quick!
Recently, our society is ‘going back’ to eating whole foods. There is a growing trend to steer away from ‘foods’ prepared by huge conglomerates who are only interested in the bottom line. We want to touch, smell, and taste our foods as they were meant to be. Many are experiencing health concerns and turning to natural foods to heal their ailments. Most foods have their roots in medicinal purposes. Remember Hippocrates? That is comforting, I believe.
Contact Marie Buckner at 360.613.1085 to schedule a cooking class.
To show how easy it is to prepare your own healthy meal, let us enjoy a full course meal. I promise that it is all quick, easy, and nutritious!
Avocado Pate (serves 4)
1 avocado, peeled and sliced
2 tablespoons Neufchatel cheese or cream cheese
3 small roma tomatoes, chopped
1 garlic clove, minced
one-half small celery stalk, diced
one-half orange, peeled and chopped
Mash avocado with fork until smooth. Stir in cheese. Add remaining ingredients. Chill in refrigerator prior to serving.
Serve with crackers, tortilla chips, or fresh veggies.
Beet and Carrot Salad (serves 3)
one-half cup beets, peeled and grated
1 large carrot, peeled and grated
4 tablespoons yogurt, plain
4 tablespoons pineapple juice
1 tablespoon walnuts, chopped
2 tablespoons raisins
Combine all ingredients together in medium bowl. Mix thoroughly and serve as either a side dish or as topping on your favorite wholegrain. Adjust amount of yogurt per your liking.
Miso Greens Soup (serves 2)
4 cups water
1 green onion, chopped
one-quarter cup miso, light variety
1 cup spinach, chopped
one-half cup tofu, firm variety, cubed
In a small bowl, dissolve miso into a small amount of hot water. Set aside. Place all ingredients in large saucepan, including miso mixture. Cook over low heat for about 10 minutes. Serve with whole wheat pita bread.
Broccoli Bravado (serves 3)
1 stalk broccoli, peeled and sliced (stems & flowerettes)
one-half cup peas
1 medium onion, sliced
2 cups brown rice, cooked and drained
one-half cup veggie broth
1 garlic clove, minced
one-quarter teaspoon each parsley, rosemary, thyme
1 tablespoons basil leaves, chopped (fresh)
In large skillet, place all ingredients except for rice. Cook over medium heat until veggies are tender. Add more liquid to prevent sticking, if needed. Remove from heat. In large bowl, combine cooked rice and veggie mixture.
Tropical Mousse (serves 4)
1 12-ounce box tofu, silken variety
1 mango, peeled and sliced
3 tablespoons coconut
one-quarter cup pineapple chunks
juice of one orange, freshly squeezed
Crumble tofu into blender/food processor. Add remaining ingredients. Puree until pudding-like consistency is reached. Adjust liquid, if needed. Serve chilled. Sprinkle with more coconut prior to serving.
Recently, our society is ‘going back’ to eating whole foods. There is a growing trend to steer away from ‘foods’ prepared by huge conglomerates who are only interested in the bottom line. We want to touch, smell, and taste our foods as they were meant to be. Many are experiencing health concerns and turning to natural foods to heal their ailments. Most foods have their roots in medicinal purposes. Remember Hippocrates? That is comforting, I believe.
Contact Marie Buckner at 360.613.1085 to schedule a cooking class.
To show how easy it is to prepare your own healthy meal, let us enjoy a full course meal. I promise that it is all quick, easy, and nutritious!
Avocado Pate (serves 4)
1 avocado, peeled and sliced
2 tablespoons Neufchatel cheese or cream cheese
3 small roma tomatoes, chopped
1 garlic clove, minced
one-half small celery stalk, diced
one-half orange, peeled and chopped
Mash avocado with fork until smooth. Stir in cheese. Add remaining ingredients. Chill in refrigerator prior to serving.
Serve with crackers, tortilla chips, or fresh veggies.
Beet and Carrot Salad (serves 3)
one-half cup beets, peeled and grated
1 large carrot, peeled and grated
4 tablespoons yogurt, plain
4 tablespoons pineapple juice
1 tablespoon walnuts, chopped
2 tablespoons raisins
Combine all ingredients together in medium bowl. Mix thoroughly and serve as either a side dish or as topping on your favorite wholegrain. Adjust amount of yogurt per your liking.
Miso Greens Soup (serves 2)
4 cups water
1 green onion, chopped
one-quarter cup miso, light variety
1 cup spinach, chopped
one-half cup tofu, firm variety, cubed
In a small bowl, dissolve miso into a small amount of hot water. Set aside. Place all ingredients in large saucepan, including miso mixture. Cook over low heat for about 10 minutes. Serve with whole wheat pita bread.
Broccoli Bravado (serves 3)
1 stalk broccoli, peeled and sliced (stems & flowerettes)
one-half cup peas
1 medium onion, sliced
2 cups brown rice, cooked and drained
one-half cup veggie broth
1 garlic clove, minced
one-quarter teaspoon each parsley, rosemary, thyme
1 tablespoons basil leaves, chopped (fresh)
In large skillet, place all ingredients except for rice. Cook over medium heat until veggies are tender. Add more liquid to prevent sticking, if needed. Remove from heat. In large bowl, combine cooked rice and veggie mixture.
Tropical Mousse (serves 4)
1 12-ounce box tofu, silken variety
1 mango, peeled and sliced
3 tablespoons coconut
one-quarter cup pineapple chunks
juice of one orange, freshly squeezed
Crumble tofu into blender/food processor. Add remaining ingredients. Puree until pudding-like consistency is reached. Adjust liquid, if needed. Serve chilled. Sprinkle with more coconut prior to serving.
Tuesday, October 24, 2006
Cranberry Relish
I love this time of year and all of its seasonal foods! Here is a recipe I developed using the cranberry, which is so popular now. It's a hit with turkey and holiday trimmings! Enjoy!!
Cranberry Apple Relish (serves 4)
1 cup cranberries, cut into half
1 whole orange, seeds removed, peeled and cubed
1 whole pear, peeled/cored/cubed
one quarter cup orange juice, freshly squeezed
2 whole apples, peeled/cored/cubed
2 tablespoons apple juice, frozen concentrate
Water
Place fruit and juices in small saucepan. Add water until cranberries are covered. Cook over medium heat. Bring to boil, reduce heat and cook til cranberries ‘burst.’ Stir frequently. Mash cranberries with fork. Adjust sweetener/liquid as needed. Store leftovers in airtight container in fridge.
1 cup cranberries, cut into half
1 whole orange, seeds removed, peeled and cubed
1 whole pear, peeled/cored/cubed
one quarter cup orange juice, freshly squeezed
2 whole apples, peeled/cored/cubed
2 tablespoons apple juice, frozen concentrate
Water
Place fruit and juices in small saucepan. Add water until cranberries are covered. Cook over medium heat. Bring to boil, reduce heat and cook til cranberries ‘burst.’ Stir frequently. Mash cranberries with fork. Adjust sweetener/liquid as needed. Store leftovers in airtight container in fridge.
Saturday, October 14, 2006
Dark Leafy Spinach Alternatives

With the recent e-coli scare involving spinach, there has been a search for healthy alternatives to this dark, leafy green. There are a variety of dark leafy green vegetables just waiting for you to try them. They can all be eaten either raw or cooked. Here are some varieties just waiting for you to enjoy them:
Kale.
This dark green vegetable has curly leaves. In fact, it is an attractive-looking vegetable. In order to assure freshness, be certain that the leaves are firm and green. They are not to be wilted. Also, the stem should be firm. Kale is the most popular substitute for spinach since its taste is the most similar.
Collards, or collard greens.
These huge, dark green leaves have sturdy stems. The stems can be used in cooking. The leaves themselves can be about a foot wide. They actually resemble super large spinach leaves. The oval shaped leaf can be just as long as it is wide. Taste-wise, they have a slightly bitter taste. When cooked, the taste becomes milder. Collards are traditionally used in Southern cooking. They go great with beans!
Swiss chard, or chard.
This dark leafy green also has large leaves. Chard is a member of the beet family. Hence, you will notice the sturdy stem to be either red or white in color. The stem is not recommended for eating. In fact, the chard leaves are pretty attractive leaves. A great way to use them is by making ‘cabbage rolls’. Substitute the cabbage with chard.
Dandelion Greens.
These dark green leaves have a bitter taste, more so than the other varieties mentioned in this article. The leaves themselves are thin and narrow. These are best used in raw salads, combined with other greens. Or, steam some up, place on a plate, and squeeze a fresh orange over them. That will sweeten their taste.
Beet Greens.
When you buy fresh beets, do not discard the greens. Use them. As a spinach alternative, they provide a slightly bitter taste. Cooked, they are much milder and enjoyable.
Mustard Greens.
Last, but not least, are mustard greens. These large leaves have a slightly peppery taste when raw. They are milder tasting when cooked. They are great in raw salads. Or, once again, steam them up and squeeze a fresh orange over them.
A great recipe involves stir frying some chopped mustard greens up with mushrooms, onions, and minced garlic. Ooh lala!
Now that we know about the alternatives available for spinach, let’s discuss how to store and buy them.
Buying Tips:
All of these fresh greens have a slight smell (scent) when purchased fresh. If they have a strong odor, do not buy them.
Leaves should stand up and feel firm. They should not droop.
Greens and colors should be vibrant, not brown or dull looking.
Freshness Tips: (these greens stay fresh only a couple of days in the refrigerator)
Separate leaves
Rinse with water
Shake off excess water
Wrap in paper towels to absorb water
Enclose in plastic bag
Store in refrigerator
All the above-mentioned dark, leafy green spinach substitutes can be eaten raw or cooked. Enjoy in salads, stir frys, or simply steamed. Also, try chopping some up and putting into spaghetti sauce or soup.
Enjoy!
Wednesday, October 11, 2006
My Two New eBooks!!
I have just published two new ebooks that are fresh on the market!
One is a how-to book titled 'Cooking & Eating the Lowfat Way'. It gives suggestions, recipes, and ideas for enjoying a meal plan that's lower in fat for optimum health.
Information is compiled from 20 years of my teaching, reading, and learning about healthy eating. It makes a great gift for anyone interested in healthy eating!
One is a how-to book titled 'Cooking & Eating the Lowfat Way'. It gives suggestions, recipes, and ideas for enjoying a meal plan that's lower in fat for optimum health.
Information is compiled from 20 years of my teaching, reading, and learning about healthy eating. It makes a great gift for anyone interested in healthy eating!
It can also be purchased in hardcopy form. Click here for online purchasing...

My other book available in ebook form is the second edition of my 'Joys of Organic Cooking, Vol. I'. It contains recipes developed over 3 years while working with an organic foods delivery firm. Recipes all include a nutritional analysis to aid in meal planning. The cookbook also introduces a variety of new uses for foods such as turnips, beets, parsnips, etc. Recipes are all taste-tested and popular with my readers plus students!
Purchase 'Joys of Organic Cooking, Vol. I by clicking here.....
Monday, September 25, 2006
Making Healthy Trails Mix Granola
If prepared properly, granola can be a great healthy food to enjoy throughout the day.
You can enjoy a bowl for breakfast, as a cereal. It can be enjoyed as a snack throughout the day. And, it is a great item to take along with you on your trail hikes. It is lightweight, easy to carry, and convenient to use. So, how do you make trail mix granola?
First of all, I say ‘prepared properly’ because many manufacturers put too much oil, sweetener, and added fillers in. Even some cookbook recipes call for too much oil. By making your own healthy version, you control what ingredients go into your mixture. That is one comforting feature of making your own trail mix granola.
Preparing your granola is best done in large batches. Granola stores easily, in airtight containers, and lasts awhile. Sometimes I store mine in gallon-size freezer bags. It works out great.
For our healthier version of trail mix granola, we substitute some fruit juice for oil. I find apple juice works best. Pear juice concentrate works just as well, however. The fruit juice adds an extra pizzazz and is a welcomed treat!
Here is what you need to make your trail mix granola:
Equipment:
Large skillet
Couple large baking sheets
Recipe/Ingredients: serves 10
(fractions are written out to help with software conversions)
One-quarter cup frozen apple juice concentrate
2 tablespoons butter
one-quarter cup frozen orange juice concentrate
one-half cup raisins
one-quarter cup unsweetened coconut
one-quarter cup dried apple chunks
one-quarter cup dates, chopped
one-quarter cup dried blueberries
one-quarter cup almonds, chopped
5 cups oats
Preheat oven to 350.
1) In large skillet, combine juices and butter.
2) Over medium heat, cook until butter melts. Stir.
3) Meanwhile, place oats into large bowl.
4) Pour juice/butter mixture over oats and fold in with large wooden spoon to evenly distribute. This is your oat mixture.
5) Spread oat mixture onto large nonstick baking sheet (maybe two). Or, lightly spritz nonstick baking sheets with oil.
6) Bake in 350 oven until granola is crispy. Not more than 15 minutes. Granola burns easily, so watch carefully.
7) Remove baking sheet from oven to a cooling rack.
8) Let granola cool thoroughly.
9) Remove granola from baking sheet.
10) Place granola into large bowl, and break up any large chunks. Add remaining ingredients and mix thoroughly.
11) Store in airtight container. Glass jars are great for storage.
12) Serve as a snack, mixed with yogurt, on cereal, as part of a fruit crisp, or topping for a pie. Or, simply enjoy on a hiking venture.
13) Just use your imagination! Enjoy!
Your homemade healthy trail mix granola will provide you with great taste, convenience, and variety!
You can enjoy a bowl for breakfast, as a cereal. It can be enjoyed as a snack throughout the day. And, it is a great item to take along with you on your trail hikes. It is lightweight, easy to carry, and convenient to use. So, how do you make trail mix granola?
First of all, I say ‘prepared properly’ because many manufacturers put too much oil, sweetener, and added fillers in. Even some cookbook recipes call for too much oil. By making your own healthy version, you control what ingredients go into your mixture. That is one comforting feature of making your own trail mix granola.
Preparing your granola is best done in large batches. Granola stores easily, in airtight containers, and lasts awhile. Sometimes I store mine in gallon-size freezer bags. It works out great.
For our healthier version of trail mix granola, we substitute some fruit juice for oil. I find apple juice works best. Pear juice concentrate works just as well, however. The fruit juice adds an extra pizzazz and is a welcomed treat!
Here is what you need to make your trail mix granola:
Equipment:
Large skillet
Couple large baking sheets
Recipe/Ingredients: serves 10
(fractions are written out to help with software conversions)
One-quarter cup frozen apple juice concentrate
2 tablespoons butter
one-quarter cup frozen orange juice concentrate
one-half cup raisins
one-quarter cup unsweetened coconut
one-quarter cup dried apple chunks
one-quarter cup dates, chopped
one-quarter cup dried blueberries
one-quarter cup almonds, chopped
5 cups oats
Preheat oven to 350.
1) In large skillet, combine juices and butter.
2) Over medium heat, cook until butter melts. Stir.
3) Meanwhile, place oats into large bowl.
4) Pour juice/butter mixture over oats and fold in with large wooden spoon to evenly distribute. This is your oat mixture.
5) Spread oat mixture onto large nonstick baking sheet (maybe two). Or, lightly spritz nonstick baking sheets with oil.
6) Bake in 350 oven until granola is crispy. Not more than 15 minutes. Granola burns easily, so watch carefully.
7) Remove baking sheet from oven to a cooling rack.
8) Let granola cool thoroughly.
9) Remove granola from baking sheet.
10) Place granola into large bowl, and break up any large chunks. Add remaining ingredients and mix thoroughly.
11) Store in airtight container. Glass jars are great for storage.
12) Serve as a snack, mixed with yogurt, on cereal, as part of a fruit crisp, or topping for a pie. Or, simply enjoy on a hiking venture.
13) Just use your imagination! Enjoy!
Your homemade healthy trail mix granola will provide you with great taste, convenience, and variety!
Tuesday, September 05, 2006
Autumn Squash Delights
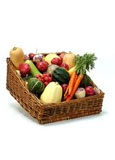
Autumn season is harvest time for a multitude of delicious and versatile squashes. Everyone seems to have their favorite, and it’s fun to experiment with them to find new uses.
For an alternative to pasta, try some spaghetti squash. These yellow ghords can easily be cut into quarters lengthwise and either steamed or baked. I prefer steaming for time’s sake. Once cooked, simply scoop out squash with a spoon. It will automatically separate into strands, reminiscent of spaghetti. It is great with some spaghetti sauce on top with a sprinkling of parmesan cheese. Or, mix with a little oil and some herbs.
Acorn squash is another delectable favorite. They are great simply cut in half and (with seeds removed) baked in a 350 oven for about 30 minutes. Poke with fork for doneness. Once done, put a dab of butter on (if desired) and sprinkle with brown sugar. My favorite is cutting the squash into cubes (it’s muscle work!) and steaming it. Once steamed, I remove the peel, discard it, and either eat the squash as is or mash with some butter and garlic. Very easy, very tasty!
For an alternative to pasta, try some spaghetti squash. These yellow ghords can easily be cut into quarters lengthwise and either steamed or baked. I prefer steaming for time’s sake. Once cooked, simply scoop out squash with a spoon. It will automatically separate into strands, reminiscent of spaghetti. It is great with some spaghetti sauce on top with a sprinkling of parmesan cheese. Or, mix with a little oil and some herbs.
Acorn squash is another delectable favorite. They are great simply cut in half and (with seeds removed) baked in a 350 oven for about 30 minutes. Poke with fork for doneness. Once done, put a dab of butter on (if desired) and sprinkle with brown sugar. My favorite is cutting the squash into cubes (it’s muscle work!) and steaming it. Once steamed, I remove the peel, discard it, and either eat the squash as is or mash with some butter and garlic. Very easy, very tasty!
Sunday, August 27, 2006
$300 a book
I've been finalizing my Vol. I 'Joys of Organic Cooking' second edition. Anyone who has never written a cookbook cannot understand the time involved. The page numbering is not transferring over properly. The table of contents needed to be done separately. Plus, I had to manually compose the index. I had to coordinate the pages with recipes. On and on....
The software I use is good for recipe input, but doesn't transfer over into a cookbook well. I need to switch to PDF. My files won't transfer for some reason. Why? Why can't I just push a button and have everything done? It's supposed to be easier than this, according to the directions.
My cookbook series has been selling via hard copy. It's so time consuming to switch everything over for online selling. Murphy's Law follows me everywhere.
Life in a cookbook author's life. For all the time involved, I should charge $300 a book. Wonder if they'd sell. :)
Saturday, August 26, 2006
Making a Whole Foods Gift Basket

What better way to share a gift of healthy eating then to give a personalized whole foods gift basket? Everyone loves a gift basket. Gift baskets can be convenient, thoughtful, and resourceful. So, you need ideas about what to put in your whole foods gift basket? It's easier than you think.
First, buy a sturdy wicker basket. The sturdier the better since some whole foods are not too lightweight. I have found great deals on used wicker baskets at garage sales, flea markets, and second hand stores. That's what is nice about baskets; they can be used over and over.
Secondly, what types of whole foods does your recipient like? I knew someone who ate nothing but fresh fruit. My gift basket preparation was easy with him in mind. Some people like only veggies. Some prefer a mixture. Whatever they prefer will be he main ingredient in your whole foods gift basket. They all make for a healthy basket.
Have some organic fresh whole foods as the base of your basket. I highly recommend organic since they really do taste immensely better than non-organic. Then add in some organic fresh herbs. Place a health-related magazine or newsletter in for extra enjoyment. You can even add a peeler, and colorful napkins to complete your whole foods gift basket. Also, have some colored heavy-duty clear wrap available. A reel of matching colored ribbon will also come in handy. This makes for an attractive display!
Let’s have some examples of what you can do with your scrumptious and healthy gift baskets:
Whole foods fruit basket:
A couple Bananas
2 tree fruit (nectarines, peaches, apricots, i.e.)
2 citrus (oranges, grapefruit, lemon, lime)
2-3 bunches sweet fresh herbs (mint, lemongrass, i.e.)
2 kiwis
1 health-related magazine (maybe a subscription)
1 peeler or appropriate kitchen utensil
Recipe for whole foods fruit chutney
Colored, quality napkins
Whole foods veggie basket:
A couple carrots with greenery on them
3 peppers (red, yellow, green)
2 garlic cloves
1 stalk of celery heart
1 eggplant or squash
1 medium onion
2-3 bunches fresh hearty herbs (rosemary, thyme, oregano, i.e.)
1 health-related magazine
Peeler and/or other kitchen utensil
Colored napkins
Recipe for veggie soup
For a Mixed whole foods gift basket:
2 carrots
2 bananas
1 stalk of celery heart
1 kiwi
1 garlic clove (keep separate from fruit)
1 eggplant
1 mango
2 bunches fresh herbs (1 hearty and 1 sweet)
1 health-related magazine
Peeler and/or other kitchen utensil
Colored napkins
Now, place the whole foods and other items into your basket. Arrange the items in an attractive manner. Wrap the basket with the colored clear paper. Secure the wrapping with the colored ribbon.
There you have it! A personalized and healthy whole foods gift basket that will be enjoyed wholeheartedly. And, it will have you being remembered for a long time!
First, buy a sturdy wicker basket. The sturdier the better since some whole foods are not too lightweight. I have found great deals on used wicker baskets at garage sales, flea markets, and second hand stores. That's what is nice about baskets; they can be used over and over.
Secondly, what types of whole foods does your recipient like? I knew someone who ate nothing but fresh fruit. My gift basket preparation was easy with him in mind. Some people like only veggies. Some prefer a mixture. Whatever they prefer will be he main ingredient in your whole foods gift basket. They all make for a healthy basket.
Have some organic fresh whole foods as the base of your basket. I highly recommend organic since they really do taste immensely better than non-organic. Then add in some organic fresh herbs. Place a health-related magazine or newsletter in for extra enjoyment. You can even add a peeler, and colorful napkins to complete your whole foods gift basket. Also, have some colored heavy-duty clear wrap available. A reel of matching colored ribbon will also come in handy. This makes for an attractive display!
Let’s have some examples of what you can do with your scrumptious and healthy gift baskets:
Whole foods fruit basket:
A couple Bananas
2 tree fruit (nectarines, peaches, apricots, i.e.)
2 citrus (oranges, grapefruit, lemon, lime)
2-3 bunches sweet fresh herbs (mint, lemongrass, i.e.)
2 kiwis
1 health-related magazine (maybe a subscription)
1 peeler or appropriate kitchen utensil
Recipe for whole foods fruit chutney
Colored, quality napkins
Whole foods veggie basket:
A couple carrots with greenery on them
3 peppers (red, yellow, green)
2 garlic cloves
1 stalk of celery heart
1 eggplant or squash
1 medium onion
2-3 bunches fresh hearty herbs (rosemary, thyme, oregano, i.e.)
1 health-related magazine
Peeler and/or other kitchen utensil
Colored napkins
Recipe for veggie soup
For a Mixed whole foods gift basket:
2 carrots
2 bananas
1 stalk of celery heart
1 kiwi
1 garlic clove (keep separate from fruit)
1 eggplant
1 mango
2 bunches fresh herbs (1 hearty and 1 sweet)
1 health-related magazine
Peeler and/or other kitchen utensil
Colored napkins
Now, place the whole foods and other items into your basket. Arrange the items in an attractive manner. Wrap the basket with the colored clear paper. Secure the wrapping with the colored ribbon.
There you have it! A personalized and healthy whole foods gift basket that will be enjoyed wholeheartedly. And, it will have you being remembered for a long time!
Monday, August 21, 2006
Cinnamon Sugar
I was surprised when I saw 'Cinnamon Sugar' at the market the other day. Located in the spice section, this appeared to be a new addition. I am amazed that people pay for this. I've been making it since I was a kid. And, my grandma was making it when she was a kid.
CINNAMON SUGAR
Cinnamon, powdered or freshly grated
Sugar, white and refined
Combine the two ingredients. Adjust amount of cinnamon or sugar to your liking.
Store in covered container til eternity ends. You can keep it in your kitchen cupboard.
Uses: sprinkle on toast, ice cream, mix into drinks, etc.
There you have it...plain and simple. Enjoy!
Subscribe to:
Posts (Atom)

